Wednesday, January 22, 2014

Brown Bread!

I have yet to really get into gluten-free cooking. Despite having several celiac and/or gluten-intolerant friends, I have found myself unable to dedicate time to it. I love whole wheat flour, and rye bread, and the stretchiness of a pie dough. One day, I will experiment with coconut and quinoa and corn and rice flours, but that day is not this day.

There's a blizzard outside today.


This calls for slices of thick, glutinous, chewy, homemade bread. And possibly soup later. Today is a day wherein I celebrate the beauty of gluten with three different flours. Here we go. Below are my compatriots:


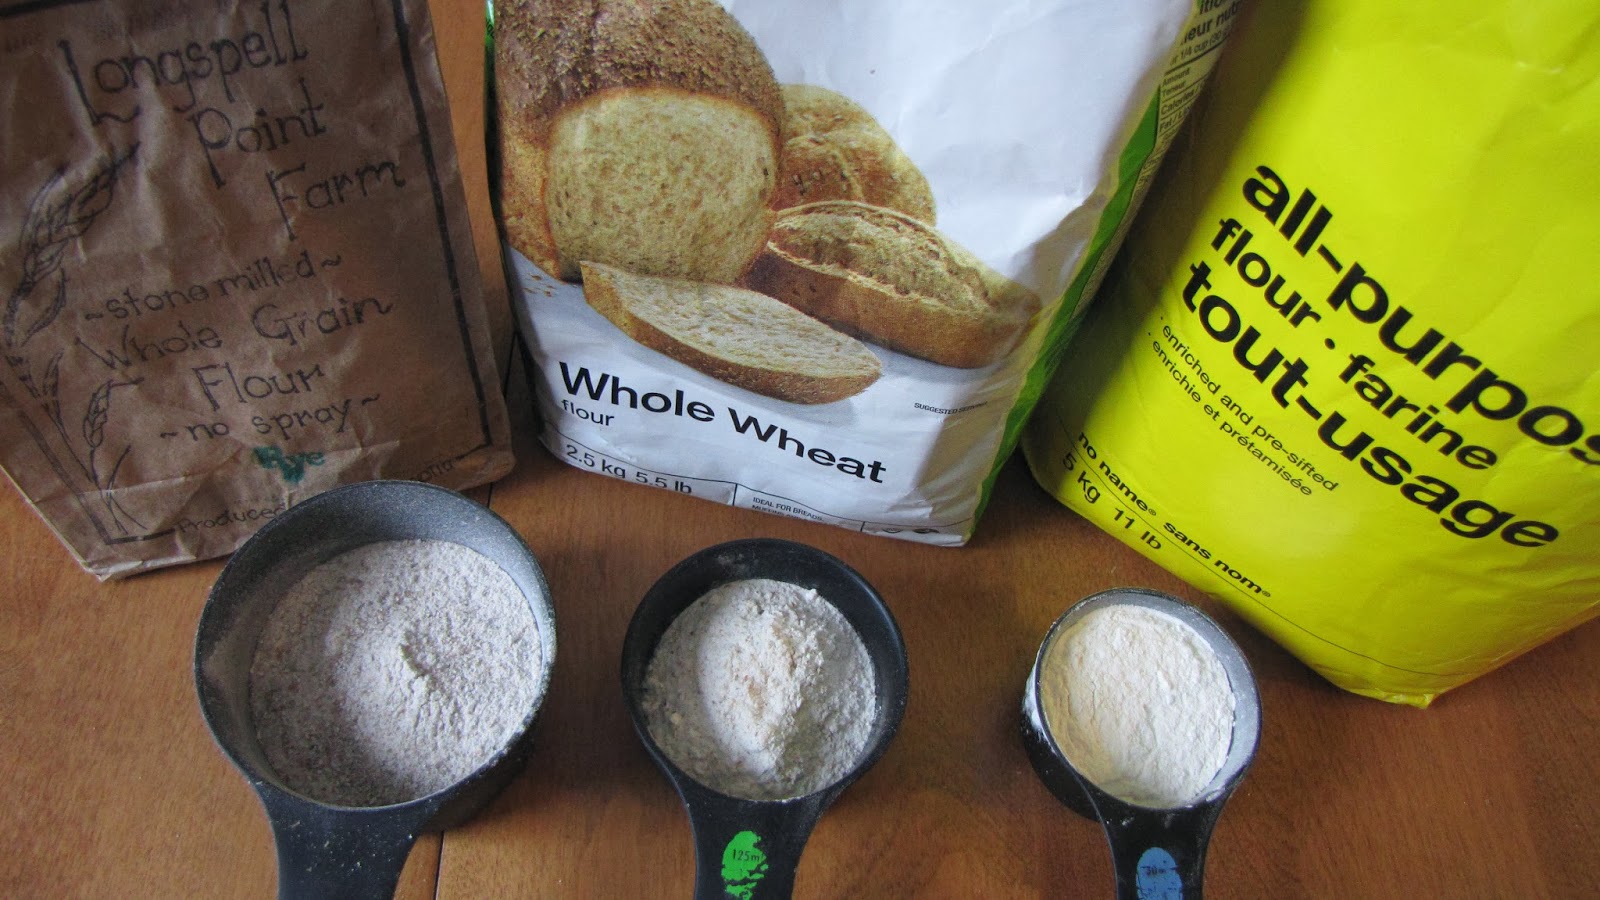
Let me introduce you to Longspell Point Farm rye flour, and generic whole wheat and white flour. All three are in this loaf today. We start off by mixing all three. This is an adapted recipe which originally uses only rye and white flours, but I didn't have quite enough rye. So, in a classic I-don't-wanna-go-shopping moment, we're using whole wheat to make up the difference. So the amounts today are:

1 3/4 cups white flour
1/2 cup rye flour
1 1/4 cups whole wheat flour
1 3/4 tsp salt
1 tsp yeast
2 tbsp unsweetened cocoa


Into this, we mix

2 tbsp honey or molasses
1 1/2 cups warm water
2 tbsp melted butter (browned, in my case)

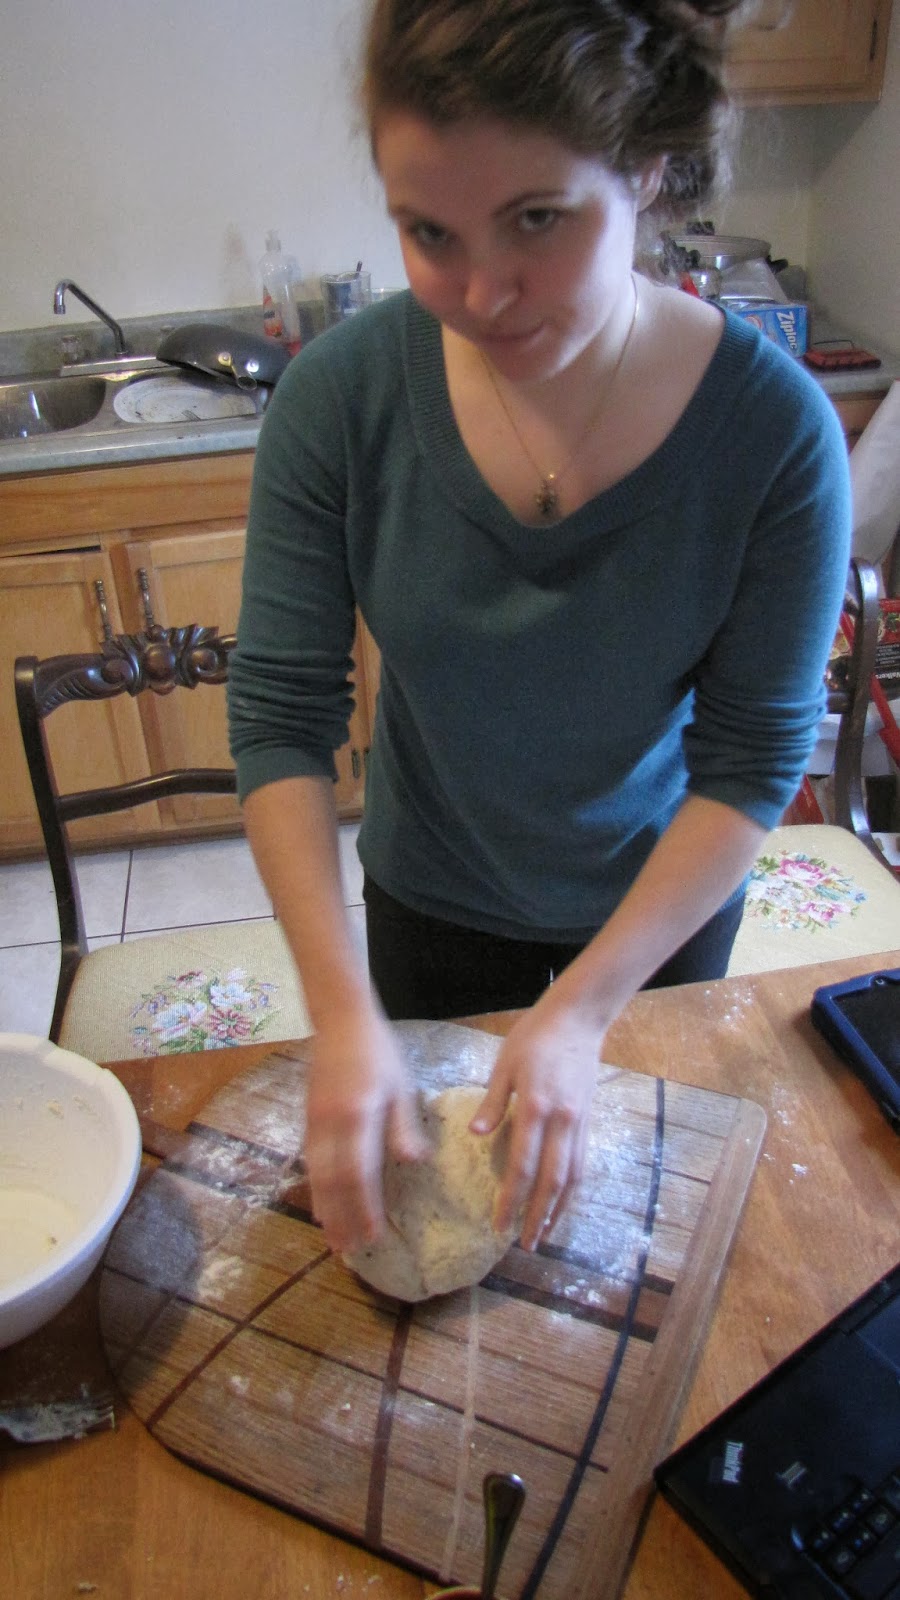
I love brown butter. This is an affection I've inherited from my mother, who makes a WICKED soy-balsamic-brown-butter sauce, and Joy the Baker. Here's an action photo for you:


Once the wet is mixed into the dry and kneaded until just slightly tacky (an operation which may require adding more flour a tablespoon at a time), it's time to rise! This is where the beloved oven comes in: cover the bottom of the pan with rolled oats or corn meal or a good layer of flour (to prevent sticking), and plop in the dough!


I chose to knead in some oats in this loaf... but I should really emphasize COVERING the bottom of the pan with ANYTHING to prevent sticking. I ended up losing some of the bottom. Anyway, cover the pot and leave for 1-2 hours in a warm place until it looks like this:


Time to put on music, wash things, take more pictures, make cocoa, and preheat the oven to 375. Pop the doubled dough in for anywhere between 30 minutes to an hour - however done you want it. After it pops out, and you've cried several times about the loaf being stuck to the bottom of the oven, it should eventually accede to your wishes and pop out of the baking dish looking like this:


...not really. This is an alternate recipe that wasn't actually made in the dutch oven but turned out looking a lot better. Here's the actual result:


Looks okay up top, but flip it over...


AHHHHHH! Mangled. Always coat the bottom of the pan with something. Still, it's good with jam. Enjoy, folks, and I wish you all the success in the world.

Tuesday, January 14, 2014

Turkey Pot Pie

Quick! The vegetables are going off! Um, ahem. I mean, let's make pot pie.

What happens when three roommates collaborate on shopping without actually communicating? A buildup of half-used containers of vegetables. Things get overlooked, forgotten, and slowly continue the process of returning to the earth in the confines of the fridge. This moment calls for drastic action with the help of some ever-stalwart onions, potatoes, and pie crust.

Here's a sneak peek:


And here's the starting lineup:


Pictured here are potatoes, broccoli, carrots, mushrooms, and onions. I don't really have amounts for this recipe. I used two medium onions, and as for the rest of the vegetables, a nice heaping double-handful of each should suffice. I am particularly disposed toward onions, so they made up the bulk of the filling (not counting the turkey). But really, whatever leftover veggies there are in the fridge should be good for this, so long as they get sliced/chopped/machetéed into pieces that don't necessitate long cooking time.

Next step: Sauté.


Everything that tastes better slightly browned goes into hot olive oil. Mushrooms, onions, and carrots were my choices. The pie is going to be baked, which means these guys will be twice-cooked. Broccoli and potatoes would go a bit mushy, so I left them out. By the way, have I mentioned that I love the smell of frying onions more than any other cooking smell? Well now you know. One day when I finish my "Ode to Allium cepa," I will never stop singing it. Anyway.

Eventually, the Step-2-veggies cooked down and browned. Time for garlic. A lot. Of garlic.


I added this after the other veggies had lost some water content and started to brown. Which brings me to the next photo:


BROWN BITS! The official name for the gorgeously umber-hued vegetable residue from the sautéed Allium cepa et cetera! Tough to clean off, but good. Those rich brown bits are going to get mixed into the sauce momentarily. For the moment, though, I'm still adding things, like MORE VEGETABLES!


Broccoli and potatoes. These are the bits that tend to go mushy if cooked too long, whereas onions and carrots are pretty stable, and mushrooms are really just here for flavour - I don't need them to hold their shape. Almost done. The last thing I add is the actual turkey.


There's a story here. This entire recipe was made possible by the donation of a large tupperware container full of leftover New Year's turkey from a friend who stayed at our apartment overnight. (A recent local freeze meant frozen pipes, loss of power, backed-up showers, and general nastiness that made people want to seek a bed somewhere else for a couple days while the plumbers sorted everything out.) In return for the couch-letting, we got turkey. Above is my attempt to shred it.

Turkey gets dumped in...


and immediately put in a different pan so I can make the sauce in the dutch oven. Just because this is an oven-dedicated site, that doesn't mean I can't ask for occasional receptacle-help.

There aren't too many photos of what happened next, because there was a lot of panicked stirring and hot oil jumping everywhere. This is what happens when Ceileigh attempts to make roux.

For those who don't know, roux is how you get really thick, creamy sauces and gravies. Equal amounts of butter and flour are stirred like crazy over heat so the two form a nicely brown, thick paste. Then you add liquid. This can be lots of things, depending on the flavour you want. If I had wine, I would have used it. But I didn't. So I used about 2 cups of chicken broth to the tablespoon each of butter and flour. After that reduced by about half, in went about half a cup of milk, some bay leaves, ground black pepper...


...as well as an ingredient particular to me:


About two tablespoons of my grandmother's homemade plum butter, which essentially pureed plums cooked down until they turn sweet, brown, and jammy. Great on toast, in salad dressings, on yogurt, or with poultry. It may seem weird, but hey, people put cranberries on turkey at Thanksgiving, so I'm well within my cooking rights. Here's what the sauce looks like after the plum butter has been mixed in:


Time to add the pan of deliciousness to the sauce and mix until evenly coated and the filling looks like this:


I cover everything with cinnamon after this. I love cinnamon on savory dishes.

And now for pie dough. This is a family recipe, and uses vegetable oil, milk, flour and salt instead of the usual flour, butter, water, and salt. It's extremely flaky and delicious, and I decided to use olive oil instead of canola for a taste experiment. Turned out pretty well!

So, 2 cups of flour and 1/2 teaspoon of salt mixed with 1/2 cup of olive oil and 1/4 cup of milk looks like this:


and then this:


and then this:


and then everything went to hell because the dough was too dry. So I ended up with a very rustic-looking top:


which wasn't bad, all things considered. It let the juice do interesting things in the oven. After dribbling some milk over the top, this behemoth went into the oven at 350 degrees and came out 45 minutes later looking like this:


Experiment successful!


First blood goes to me! Yum. That's gonna be hard to clean.

Tuesday, January 7, 2014

Brussels Sprouts, Finally Tasty

I never had any definite feelings about brussels sprouts while growing up. My parents never tried to make me eat them, perhaps taking a cue from my inability to consume broccoli without myriad threats. Because of this, I was neutral on the subject of the offending sprouts and they remained a vegetable that I acknowledged until my twenties as 'probably terrible,' given their green existence.

And then, I tried them.

This is a recipe adapted from Fine Cooking, a magazine that I practically read for bedtime stories. Before searching for this recipe, I had come across quite a find at my farmer's market. This is the find:


These are rubine brussels sprouts. (Photo credit to goodeverydaythings.com). Beautiful purple and red and green. I got them without knowing what I would make with them. I eventually did this: 


Seared, steamed, and balsamiced. So good. As you can see, those aren't rubine sprouts. Unfortunately, I didn't have my oven at hand when I purchased the reddish ones. So, I'll be recreating the recipe with these boring (but still tasty!) green ones. First step: HALVE ALL THE THINGS!


Thereby making a beautiful flat surface which will sear to a deep brown. So, heat up some oil, and place these buggers face-down in the pan, like so:


There are many sounds more beautiful than spitting oil, but it does happen to be a favorite of mine. God I love this pot. ANYWAY, here they are, searing. I really crowd them in, which is fine, since they're going to get (SPOILER ALERT) steamed anyway. I generally add in about 3/4 of a cup of water. But it can also be a dry white wine or chicken broth or sherry or however you want the sprouts to taste. When they're brown on the bottom, pour in the liquid and cover. It's time to stop steaming when a knife blade easily punctures all but the very center of each half-sprout. Take off the cover and let any remaining liquid evaporate. 

THEN, my lovelies, is my favorite part. 3-4 tablespoons of balsamic vinegar, straight into the pan.


 At this point, it's time to toss the sprouts around a bit, to get them evenly coated. Once the vinegar is absorbed, it's time to eat! 

In the past, I've had this dish with pomegranate seeds and shaved Parmesan, which is my favorite way to eat it, but this is also surprisingly good on eggs, as pictured below. I made them in the same pot, by the way, for deliciously balsamic-flavored scrambled eggs. Mmmm. 

Butter for the eggs melting right on top of the leftover balsamic glaze. 


Eggs thoroughly beaten + salt and pepper


You can JUST see the eggs under the sprouts... they make a really good background comfort taste for the crunchy sprouts and vinegar tang. 


Et voila. Good for breakfast or a lazy dinner, as this happened to be. Hope you try it!

Bread and Wine

My wonderful friend Karina visited me in the frozen North from her equally frozen Midwest, and brought along this beautiful bread.
Here's the master, kneading and wondering why I'm not helping.
This particular bread is called Sheepherder's Bread. It's a double-rising dough, and even after being punched down will completely fill the inside of whatever vessel you care to bake it in. In this case, that vessel is of course my wonderful red oven. As the idea for this blog had not entirely formed while this bread was being made, there are just a couple pictures, but more will follow!

Here's the bread, ready to go in the oven after it's second rise.
And here it is again, baked and beautiful.
This bread is beautifully fluffy, but substantial. I'd use this for bread pudding or french toast if any survives after the initial feeding frenzy is over. Here's the recipe:

from Pacific Northwest the Beautiful Cookbook
Makes 1 loaf

Notes: Everything always tastes better around the campfire, & bread is no exception. This is a dressed-up version of a back-country favorite. It takes some practice over a campfire, but it’s well worth the effort! Try it first at home in a conventional oven or in a covered grill for a colorful addition to an informal meal.

2 c. (16 fl oz./500 ml) warm (110º) water
¼ c. (2 fl oz./ 60 ml) melted butter, cooled to lukewarm
¼ c. (2 oz./60 g) sugar
1¼ t. salt
2 packages active dried yeast
About 5 c. (20 oz/625 g) unbleached all-purpose (plain) flour
1 T. chopped fresh rosemary, or 1 t. dried
Olive oil
Fresh herb sprigs for garnish
Coarse salt for garnish

Pour the hot water into a large bowl. Add the melted butter, sugar, & salt. Stir in the yeast & let sit for 10 min., or until bubbly.
Add half of the flour to the yeast mixture & beat until very smooth. Cover with a cloth & let sit for 10-15 min. Stir in the rosemary & remaining flour until the dough holds some shape & begins to pull away from the sides of the bowl. The dough should not be too stiff.
Turn the dough out onto a lightly floured board & knead for 1-2 min., or until the dough is smooth & elastic. Cover with a clean, damp towel & let rise until almost doubled, about 1 hr.
Punch the dough down & knead it again. Brush the inside of a medium Dutch oven & the inside of the lid with olive oil. Form the dough into a ball & place it in the pot. Garnish the top of the loaf with herb sprigs & sprinkle coarse salt over the top. Cover with a damp towel & let rise until nearly doubled.
To bake in a conventional oven: Preheat the oven to 350º. Put the lid on the pot & bake the bread for 20 min., then remove the lid & bake for 15-20 min. longer, or until the bread is browned & hollow-sounding when tapped.

In case you DO decide to make bread pudding or some such sweet, I'd suggest pairing it with this mulled wine that we made out of some really tasty Shiraz from Gallo Winery, pictured below:
The spices in here are primarily cinnamon sticks, cardamom pods, nutmeg, and a big ol' orange slice. The spices came from a package, and therefore I can't be sure that's all, but the amounts below are my best guesses.

Mulled Wine
1/2 cup water, more as needed
750 ml fruity red wine (recommendations are shiraz or cabernet sauvignon)
1/4 cup of granulated sugar (more or less depending on your sweet tooth)
3 large cinnamon sticks
1/4 teaspoon nutmeg
4-6 cardamom pods
pinch salt

Thursday, January 2, 2014

Welcome

Welcome to One Oven. My kitchen is, for all intents and purposes regarding this blog, a beautiful red dutch oven given to me for Christmas by my lovely Aunt Kunyi. Everything appearing on this blog will be something that is made in this lovely receptacle. So, let the cooking commence! I'd love your suggestions, recipes, and comments, and welcome once again!